Why Won’t My Automatic Gate Open? The Seven-Step Diagnostic Frank Uses on Every Georgia Call
Your automatic gate won’t open most often because it’s lost power to the control board, the manual release has been tripped, or an obstruction sensor is reading a false positive — these three causes account for roughly 60% of the no-open calls we run in Georgia. Before you call anyone, there’s a two-minute sequence that’ll tell you whether you’re looking at a dead outlet or a dead motor. Here’s how Frank Hughes, our owner and lead technician, walks through it on every job — in the order that actually saves time, not the order you’ll find in generic troubleshooting guides.

We’ve been the Gate Repair in Georgia homeowners call when the gate won’t budge, and after eight years of gate-only work, we’ve learned that the fastest fix is usually the one customers skip because it seems too simple. If you’d rather have us diagnose it, call (833) 863-4140 — estimates are free, and Frank answers personally.
Step 1: The Control Board Power LED — Half Your Diagnostic Tree Lives Here
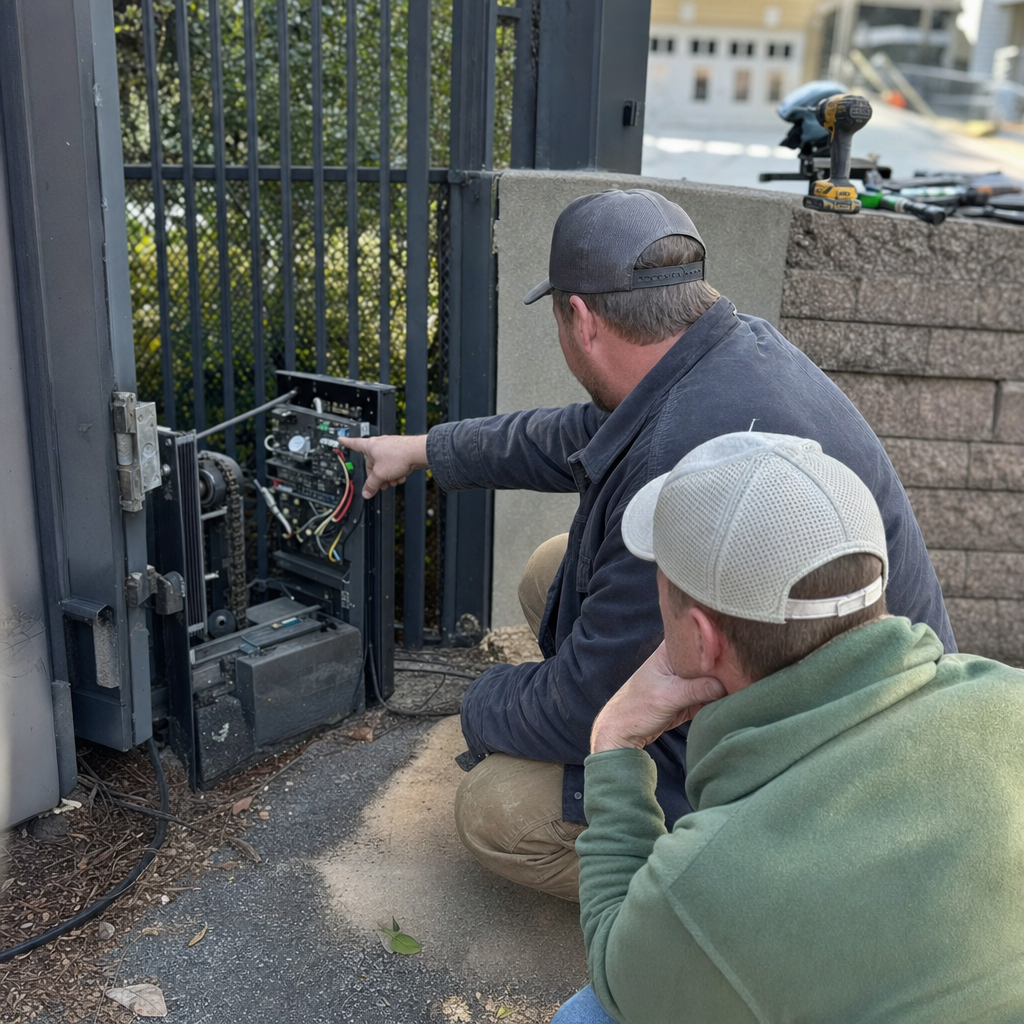
Before Frank touches a gate that won’t open, he checks the power LED on the control board. If it’s off, half the diagnostic tree collapses immediately — no power means no point testing the motor, the sensors, or the remote. Most people skip this and spend twenty minutes troubleshooting the wrong system.
Here’s what to look for: open the operator housing and find the small LED near where the power cord enters the board. On LiftMaster residential operators common across Georgia subdivisions, it’s a steady amber when healthy. On Elite systems, it’s green. No light? Check your breaker, then the GFCI outlet feeding the operator — Georgia’s humid summers trip outdoor GFCIs more often than you’d think, especially in shaded installations where moisture lingers. If the LED’s on but blinking, skip to Step 7 — that’s an error code, and the blink pattern matters.
Power restored but gate still won’t open? Move to Step 2. Power’s good and no blink code? Continue through the sequence.
Step 2: The Manual Release Test — Separating Electrical from Mechanical Failure
Every automatic gate operator has a manual release — usually a key-turned lever or a pull-cord inside the housing. Disengage it and try moving the gate by hand. This single test tells you whether you’re chasing an electrical problem or a mechanical one.
- Gate moves freely by hand: The track, wheels, and hinges are fine. Your problem is electrical — motor, control board, or safety circuit.
- Gate won’t budge or grinds heavily: You’ve got a mechanical bind. In Georgia, this is where local knowledge becomes critical.
Here’s the Georgia-specific detail generalist handymen miss: our sandy loam and clay soil heaves seasonally. A gate that opened fine last fall may drag the ground in spring when frost-free soil expansion shifts the post. We’ve seen this in older Alpharetta neighborhoods with mature oak root systems, in the red-clay expanses of Gwinnett County, and anywhere in Georgia where the freeze-thaw cycle runs deeper than people expect. The fix is gate adjustment and post re-plumb — not motor replacement. A contractor who doesn’t recognize soil heave will sell you a $1,800 operator when you need a $300 track realignment.
Frank’s seen this exact scenario dozens of times. “If I can’t explain what’s wrong with your gate in plain English, I haven’t looked at it closely enough.” The manual release test prevents that misdiagnosis.
Step 3: Obstruction Sensors — The “Ghost Obstacle” Nobody Talks About
Photoelectric eyes and loop detectors are designed to stop the gate from closing on a vehicle. What they don’t advertise is how often they refuse to open the gate because they’re reading something that isn’t there.
Photoelectric eyes: check alignment first. Georgia’s afternoon thunderstorms knock them crooked, and our heavy pollen season in March and April coats the lenses until they’re effectively blind. Clean with a damp cloth — no solvents, which can cloud the plastic.
Loop detectors embedded in your driveway: these are the hidden culprit in maybe 15% of our no-open calls. Wet leaves, puddle reflections, freshly sealed asphalt, even the rebar pattern in a new concrete pour can read as an obstruction to an oversensitive loop. The gate thinks something’s blocking it and won’t open. Recalibrating loop sensitivity takes about fifteen minutes with the right tool — it’s not a homeowner fix, but it’s not a motor replacement either. We carry loop calibrators on every truck.
Quick check: if your gate opens fine with the keypad or indoor button but not the vehicle exit loop, you’ve almost certainly got a ghost obstacle.
Step 4: Remote Battery and Frequency — The Embarrassing Fix
We won’t judge. Frank has personally driven to calls where the remote battery was dead, and he’ll tell you it’s more common than failed control boards. Replace the CR2032 or equivalent — most Georgia residential gates use standard coin cells — and test from ten feet, then from your normal parking position.
Frequency interference is the less obvious issue. New construction in growing Georgia exurbs means new WiFi extenders, smart home hubs, and even LED landscape lighting that can step on your gate remote’s frequency. If the wall button works but remotes are intermittent, interference is likely. We can reprogram or swap to a different frequency band — another reason factory-trained brand knowledge matters. We’re certified on nine major brands including LiftMaster, FAAC, BFT, and Mighty Mule, so we know which systems have frequency flexibility and which need receiver replacement.
Step 5: Limit Switch Position — When the Gate “Forgets” Where It Is
Gate operators track open and closed positions through magnetic or mechanical limit switches. If these drift — from vibration, temperature cycling, or physical impact — the gate may think it’s already fully open when it’s actually shut, or vice versa. The motor runs briefly, then stops, and you’re standing there wondering why nothing happened.
On sliding gates, check whether the gate physically reaches its mechanical stops. On swing gates, listen for the motor straining against the hinge limit. Re-setting limit switches requires entering the operator’s programming mode, which varies by brand. This is where we draw the first DIY line: you can check whether the gate reaches its mechanical limits, but reprogramming the switches without documentation risks losing all position memory and potentially damaging the motor drive.
Step 6: Motor Capacitor Test — The Part That Fails in Georgia Heat
Capacitors give the motor its starting torque. They degrade faster in hot, humid climates — which describes most of Georgia from May through September. A failing capacitor often presents as a humming motor that won’t turn, or a gate that starts moving then stalls under load.
Testing requires a multimeter and discharging the capacitor safely — this is strictly licensed-technician territory. Capacitors store lethal voltage even when power’s disconnected. Frank’s training through Gwinnett Technical College’s welding and industrial maintenance program included electrical safety protocols that general handymen rarely encounter. We don’t recommend homeowner testing here.
Capacitor replacement typically runs $180–$340 including diagnosis and labor, versus $800–$1,400 for full motor replacement. Correct diagnosis saves you that difference.
Step 7: Control Board Error Codes — The Blink Pattern That Tells the Story
This is where brand-specific training pays off. Both LiftMaster and Elite gate operators — two of the most common residential brands we service across Georgia — use onboard LED blink sequences to indicate exact faults.
LiftMaster: Count the amber blinks between pauses. One blink = open limit fault. Two blinks = close limit fault. Three blinks = obstruction sensed during close. Four blinks = motor overload. Five blinks = control board internal fault.
Elite: Green LED with different patterns. Steady green = normal operation. Slow flash = standby. Fast flash = fault condition — count the flashes to identify: two = motor circuit, three = safety loop, four = limit switch, five = control board.
Relaying the blink pattern when you call lets us arrive with the right part instead of making a diagnostic trip. It also tells you immediately whether you’re looking at a $200 safety loop adjustment or a $900 control board replacement.
The Repair vs. DIY Line — What You Can Check and What You Shouldn’t Touch
We’re direct about this because we’ve seen secondary damage from well-meaning self-repair that turned a $200 fix into a $1,100 replacement.
| Owner-Safe Checks | Licensed Tech Only |
|---|---|
| Control board power LED visual check | Opening motor housing or control board enclosure |
| Manual release operation | Capacitor testing or replacement |
| Photoelectric eye cleaning and alignment check | Loop detector recalibration |
| Remote battery replacement | Limit switch reprogramming |
| GFCI and breaker reset | Any welding or structural repair |
Anything involving stored electrical energy, control board programming, or the mechanical load path of a heavy steel or aluminum gate belongs to a trained technician. Gates weigh 300–800 pounds routinely. A slip during manual testing can cause serious injury. We’re insured and bonded, and we’ve got the factory training on nine brands to fix it without the guesswork.
When Georgia’s Climate Is the Real Problem
Beyond the seven-step diagnostic, we’ve learned that Georgia’s specific conditions create failure patterns you won’t find in national troubleshooting guides.
Our clay-heavy soils in the Piedmont region expand and contract dramatically with moisture changes. A gate post that was plumb in October may lean two inches by April. That doesn’t just cause binding — it puts asymmetric load on the operator, accelerating bearing and gear wear.
Coastal Georgia’s salt air, even thirty miles inland, corrodes aluminum track and steel hardware faster than inland climates. We use marine-grade hardware on Savannah-area installations, and we stock it for repairs.
And Georgia’s afternoon thunderstorm pattern means more lightning-induced control board failures than you’d see in drier climates. Surge protection is worth the $80–$120 add-on when you’re already replacing a board — we’ve stopped counting the number of customers who’ve needed second boards after skipping it the first time.
What This Diagnostic Sequence Actually Costs
Here’s what we’ve charged for the most common fixes that emerge from this seven-step process, based on our Georgia service history:
| Issue Found | Typical Range | Time to Complete |
|---|---|---|
| Dead remote battery / reprogramming | $0–$85 | 15 min |
| GFCI reset or outlet repair | $0–$150 | 15–30 min |
| Photoelectric eye realignment | $120–$180 | 30 min |
| Loop detector recalibration | $150–$220 | 30–45 min |
| Limit switch reset / reprogram | $140–$200 | 30–45 min |
| Capacitor replacement | $180–$340 | 45–60 min |
| Post re-plumb / track realignment (soil heave) | $280–$550 | 1–2 hours |
| Control board replacement (with surge protector) | $650–$950 | 1–2 hours |
| Full motor / operator replacement | $1,200–$2,400 | 2–4 hours |
These are ranges, not quotes. Every gate setup in Georgia is different — post depth, voltage run length, brand age, and access all move the number. Call (833) 863-4140 and we’ll give you a firm estimate after looking at it, not a guess over the phone.
FAQs
Overnight failures are usually power loss, a tripped GFCI from humidity or rain, or the manual release being bumped — check the control board LED and try the release lever first. If those are normal, a photoelectric eye may have been knocked out of alignment by wind or an animal. Call (833) 863-4140 if the simple checks don’t reveal it — we’ll walk through the blink code over the phone before dispatching.
Repair is cheaper if the motor and control board are functional — capacitor, limit switch, or sensor fixes typically run $150–$400, while full operator replacement starts around $1,200. We only recommend replacement when the motor is seized, the board is obsolete, or repair parts exceed 60% of replacement cost. Frank makes that call on-site with the housing open, not from a checklist.
We complete roughly 70% of no-open calls same-day when we’re contacted before 2 PM, and we carry capacitors, control boards, and safety components for all nine brands we service. Emergency after-hours service is available for security-critical situations. Call (833) 863-4140 — Frank answers directly and can tell you real-time availability.
This almost always means the operator has power and the motor is functional — the problem is isolated to the remote signal path. Start with the battery, then test from closer range to rule out interference. If the keypad works consistently but remotes don’t, you’re likely looking at frequency interference or a failing receiver, both of which we can diagnose and fix in one visit. Call (833) 863-4140 for a free estimate.
Eight Years. One Trade. Gates Only.
Beacon Gate Repair Georgia isn’t a fence company that does gates on the side, or a handyman service figuring it out as we go. We’ve got 570 verified reviews at 4.7 stars because Frank Hughes shows up personally, diagnoses correctly, and fixes it without the upsell runaround. From a broken weld to a full access control system, we handle every part of the job in-house.
If you’ve run through the checks above and your gate still won’t open — or you’d rather skip straight to the expert — call (833) 863-4140. Estimates are free, and Frank takes your call himself.
Written by Frank Hughes, Owner & Lead Technician at Beacon Gate Repair Georgia, serving Georgia, GA.